
The USB stick
These are the two file systems Samsung supports. FAT32 when every file is under 4 GB; NTFS when a single video is bigger. If a stick misbehaves, reformat to FAT32 first.
Images: JPEG, PNG, BMP — max 20 MB per image (the limit people trip over most often). No WebP, GIF, TIFF or SVG. Videos: MP4/MKV/MOV and most common containers.
| Video codec | Max resolution | Max bitrate |
|---|---|---|
| H.264 (recommended) | 4096×2160 @ 30fps, or 3840×2160 @ 60fps | 60 Mbps |
| HEVC / H.265 | 4096×2160 @ 60fps — only in MKV/MP4/TS | 80 Mbps |
| VP9 | 3840×2160 @ 60fps | 80 Mbps |
| MPEG2 / MPEG4 / VC1 / VP8 | 1920×1080 @ 60fps | 20 Mbps |
Files in the root or in folders both work. Folder names that are too long can't be selected on screen. A slideshow needs at least two images — a lone image will not start.
Play directly from USB
Menu → System → Play via → MagicInfo. The Player only exists in this mode.
Menu → System → Time → Clock Set. Both Player and Schedule refuse to work without it.
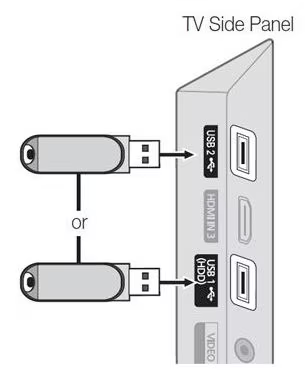
Any USB port on the connector panel.
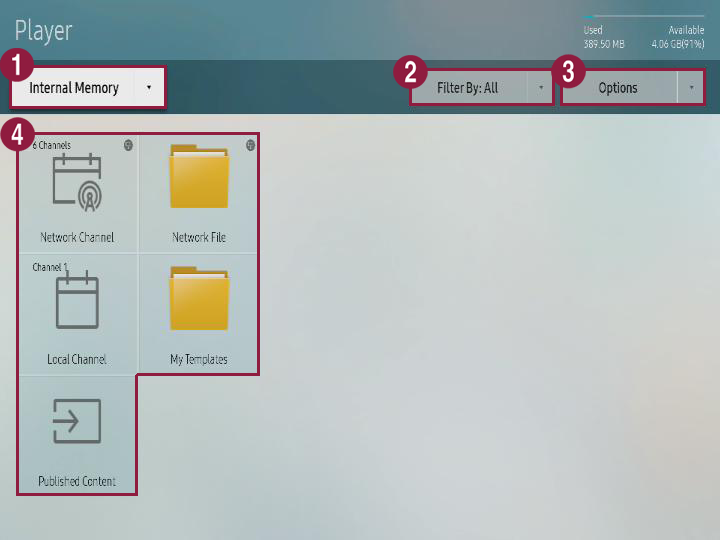
Press Home on the remote, select Player. Storage used/available shows top-right; a storage selector sits top-left.
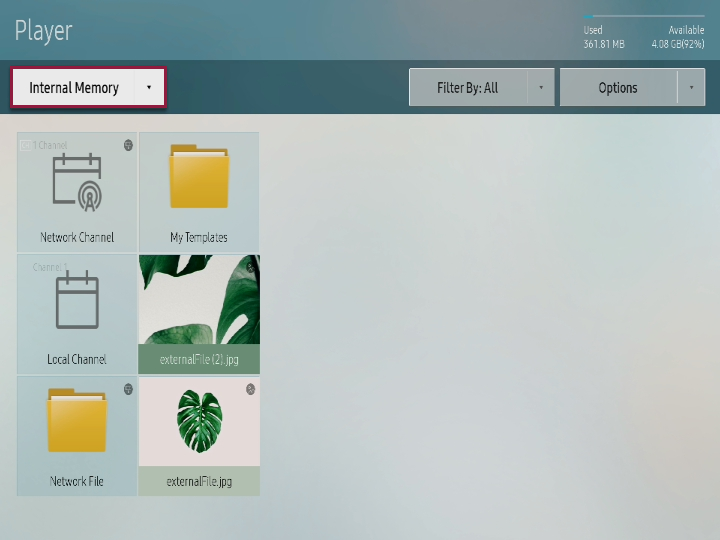
Open the top-left dropdown — the USB entry only appears while a stick is inserted.
Selecting a file plays it. Selecting a folder plays its contents in alphabetical order as a loop — images become a slideshow. Filter By narrows to one content type.
- TOOLS — menu bar: Playlist, Channel List, Repeat All / Repeat One, Background Music
- ►/◄ — next / previous item · Enter — play/pause · Stop — back to Player
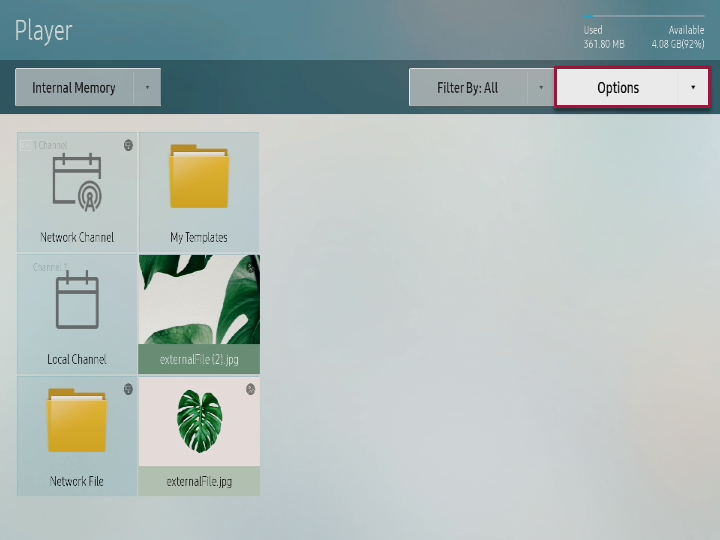
Options (top-right) holds Slide Show Speed and Effect, Contents Size, Default Contents (the fallback when nothing is scheduled — set it so the screen never goes blank), Safely remove device.
Copy to internal memory, remove the stick
The screen has 8 GB internal storage; the system takes about half. Plan content around a 4 GB ceiling.
With the storage selector on the USB device, open Options → Send. Tick the files, confirm Send → destination Internal Memory. Regular files land in the internal memory root; template (.LFD) files land under My Templates. (Copying the other way, to a stick, everything lands in a MagicInfoSlide folder. Delete works the same way: Options → Delete, then tick.)
Options → Safely remove device, pull the stick, set the storage selector back to Internal Memory, play from there. The screen now runs with nothing attached.
On-device scheduling with the remote
Shows a storage selector, Send and Delete buttons, and three local channels CH 1 / CH 2 / CH 3 with their programs as time-labelled thumbnails.
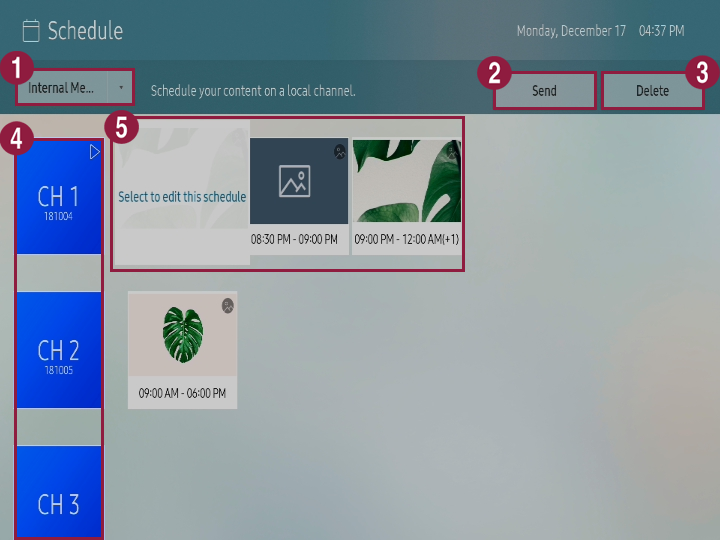
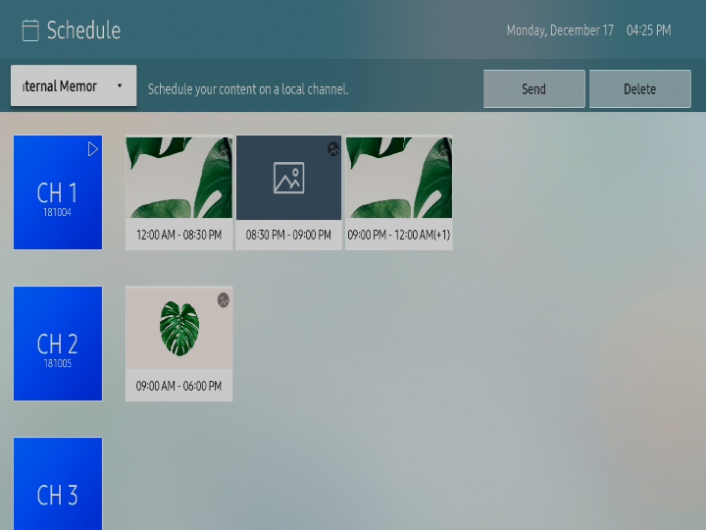
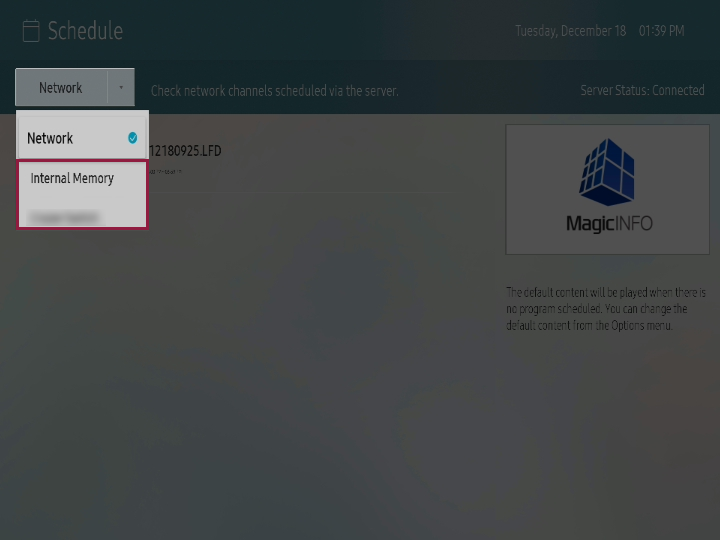
Select "Select to edit this schedule" → the Edit Schedule screen has three parts: add content, set Start Time / End Time (or tick 24 hours), and name the channel. Save. Repeat to lay consecutive slots across the day.
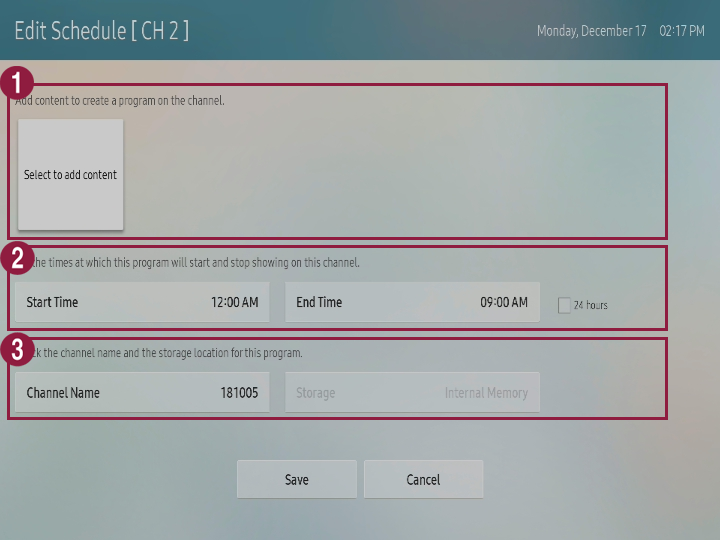
After Save, press Return to leave the Schedule screen — there is no apply button; the channel plays each program at its set times. The top-right Send / Delete buttons are only for cloning a channel to USB (next step) and removing one.
Home → Player → Options → Default Contents → tick one file → Done. It plays whenever no slot covers the current time.
Select a configured channel → Send → copies channel + schedules to a USB stick. On the next screen, Send it back from the stick. This is how you replicate one configured screen without a server.
Home → On/Off Timer — seven independent on-timers and off-timers, each with Off / Once / Everyday / Mon–Fri / Mon–Sat / Sat–Sun / Manual day patterns, wake source and (for MagicInfo mode) the content to play at power-on. Holiday Management suppresses timers on date ranges. Samsung recommends the timer's content live on internal memory, not USB.
The auto-publish USB (Contents / Schedules)
The "insert a stick and walk away" workflow, for content authored in MagicInfo Author/Premium and published to USB instead of the network.
USB root/
├── Contents/
└── Schedules/
These two folders are written automatically when publishing to a USB device from the MagicInfo authoring tools — don't create them by hand with loose files.
Menu → System → Security → USB Auto Play Lock:
- Off → published USB content plays automatically ← what you want
- On → nothing plays; the screen flashes "USB Auto Play Lock : On" for 5 seconds
Also confirm USB Lock in the same menu is Off, or the ports are dead entirely.
Properly published content appears as a Published Content tile on the Player screen and starts on its own. It can be copied to Internal Memory (it shows up there as one opaque "Published Content" item — the folders are absorbed).
Contents + Schedules = real published schedule that auto-plays. A folder named MagicInfoSlide = plain loop of loose media files (and it's also where the screen puts files it exports). Mixing them up is a classic support call. The folder name's capitalisation doesn't matter on FAT32 or NTFS — Samsung's own documents spell it both ways.USB mode vs Server mode
| USB mode | Server mode | |
|---|---|---|
| Cost | Free | Free (25 Lite licenses, claimed in the console) |
| Change content | Site visit with a stick | From a browser, anywhere on the network |
| Scheduling | Daily time slots only, 3 channels | Full calendar, day-of-week, unlimited |
| Layouts | Single full-screen zone | Multi-zone layouts, tickers, templates |
| Monitoring | None | Status, remote reboot, proof of play |
| Storage | ~4 GB internal | Server library, screens cache locally |
| Needs network | No | Only when publishing — screens play offline |